From Trackpedia
Feel free to make changes to this document if you are qualified to do so. It is for PRO TRACK configuration at Shannonville Motorsports Park
Track Map
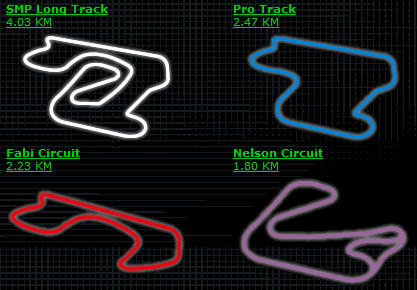
This Guide is for the Pro Track configuration
Turn 1
Turn 1 is a constant radius right-hand, flat corner. Coming down the front straight the rider will be at WOT and will negotiate Turn 1 without a downshift and only a slight roll-off of throttle, just enough to settle the bike under the hard acceleration, before re-applying it through the corner. Entering from a leftmost line on the straight, use the end of the pit wall as a reference of when to tip into the right. Turn 1 is bumpy with unforgiving runoff. The rider should turn in and aim to hit the starting edge of the inside rumble strip as he/she applies throttle around the corner, taking care not to drift too far left on exit to ensure proper track position for the Turn 2 left-hander.
Turn 2
Turn 2 is a ever-so-slightly banked left hander with a noticeable trough/bump near the apex through the optimal racing line. The rider will typically negotiate Turn 2 using the same gear selection used through Turn 1. Entrance does not require braking, just a quick roll-off of throttle to settle the bike. Turn 2 can be entered from a centerline position on the short section between Turn 1 and 2 as Turn 2 has a wide exit for carrying plenty of speed and getting on the throttle early. The exit brings the rider onto a short straight. Where the straight meets the section where the Fabi configuration blends in, there is a slight berm/bump that will cause the front end to get light or lift off the ground under acceleration. The rider will typically upshift once upon exiting Turn 2
Turn 3
Turn 3 is a slightly decreasing radius right-hander with concrete patches through the centerline around the corner itself. Typically, the same gear selection used to negotiate Turn 1 and 2 will be used for Turn 3, though Turn 3 is a slower corner. From WOT down the short straight preceding Turn 3, the rider can brake deep into the entry aiming to hit the apex where the first concrete patch creates a "path" between it and the rumblestrip. The rider will maintain smooth and constant throttle as well as a tight line for a good Turn 4 entry position in the centerline/right section of the track
Turn 4
Turn 4 is a left-hand bend with a concrete patch through/near the racing line at the apex. It is typically negotiated with the same gear selection used in the previous Turn 3. Enter from the right of centerline taking a late apex to be on the leftmost side of the track for entrance to the Turn 5 hairpin
Turn 5
Turn 5, a right-handed 'hairpin' is a the slowest section of the track. It is typically negotiated in 2nd or 1st gear and requires hard braking providing the rider has carried good rhythm and speed through the Turn 3/4 combination. The rider will enter this flat corner left of centerline, taking a late apex and 'chopping' the apex at the mid-point between the concrete patch and rumblestrip, while applying the throttle aggressively as the bike is brought onto the long backstraight
Turn 6
Turn 6 is an ever-so-slightly increasing radius right-hand corner. Entrance requires heavy braking as it is at the end of the longest fastest straight on the course. Braking markers are provided on the left side along the Fabi pit wall.
Deep trail braking is possible into this corner while still carrying plenty of speed. Being a flat corner with no obstructions, the exit is plainly visible throughout negotiation of Turn 6. A quick clip of the apex and fast roll on of full throttle utilizing all of the track on exit is best practice as being on the left side of the track is the proper position for Turn 7A & 7B
Turn 7
Turn 7A and 7B is a right-left chicane, flat with a slightly bumpy surface. It is typically negotiated using the same gear selection used through the previous Turn 6. Turn 7A and 7B can be taken using the intuitively way through, while more experienced racers will be faster through it due to their comfort in quick directional transitions. Exit with a rightmost track position for Turn 8 setup.
Turn 8
Turn 8 is a flat, 90 degree left-hand bend with a concrete strip through/near the apex. Down 1 or 2 gears from the selection through the previous chicane with heavy braking/trail-braking on entrance. The rider will take a late apex for a left of centerline track position on exit
Turn 9
Turn 9 is a flat constant radius right-hand corner. It is the final corner leading onto the front start/finish straight. Typically negotiated using the same gear selection used through the previous Turn 8 while some riders may elect for a quick upshift just before tipping in, as the rider will be on the throttle briefly between Turn 8 and 9. Turn 9 can be entered from a centerline track position, aiming to make apex where the rumblestrip begins, though only momentarily as the rider will want to begin throttle application at this point to make use of the wide exit to carry as much speed as possible down the front straight and into Turn 1